How to pick orders
Table of contents
- Introduction
- Allocation and picking
- Printing picking lists and delivery notes
- Correcting mistakes
- Finishing the order
- Video on how to pick orders in Ongoing WMS
- Picking multiple orders at the same time
Introduction
In Ongoing WMS, orders are used to ship goods from the warehouse to customers. This guide shows you how to process an order in the system. You will learn how to:
- Pick the goods in the system.
- Print pick lists.
- Finish an order.
Allocation and picking
Picking goods in the system is a three-step process:
- The first step is called allocation. This ties specific article items to the order, but the article items are still considered to be in stock at the warehouse.
- The second step is called picking. This is what marks the allocated article items as having actually been picked, and removes them from stock.
- The third step is called packing. This marks a picked item as having been packed. This step is not mandatory. Most warehouses do not use it.
When picking goods in the system, you have the option of either having the system do it for you, or selecting the goods yourself manually. Below we will demonstrate how to use both of these methods. Our test order will be an order where the customer has ordered 1 piece of article A1 and 2 pieces of article B1:

Option 1: letting the system automatically select goods (most common)
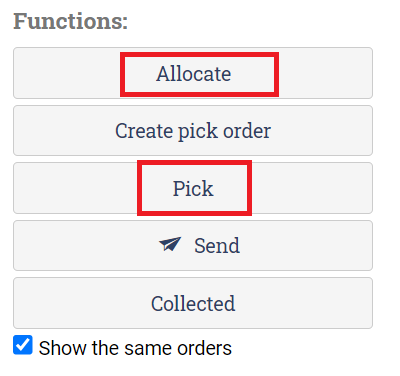
Letting the system automatically choose which items to pick is the quickest way to pick an order. You can do this by checking the order in the order list, and then pressing Allocate and then Pick:
The logic which the system uses to select goods is customizable. There are many different choices. Some of the most popular are:
| Picking method | Description |
|---|---|
| FIFO (first in, first out) | The goods items which were received first, will also be selected for picking first. |
| Full pallet, then FIFO | Attempts to pick as many full pallets as possible. After that it resorts to FIFO. |
| Lowest count, then FIFO | Attempts to pick from the location with the fewest items on it. After that it resorts to FIFO. |
| Expiry date, then FIFO | Attempts to pick the items which are going to expire first. After that it resorts to FIFO. |
Video on how to change allocation method in Ongoing WMS
Option 2: selecting goods manually
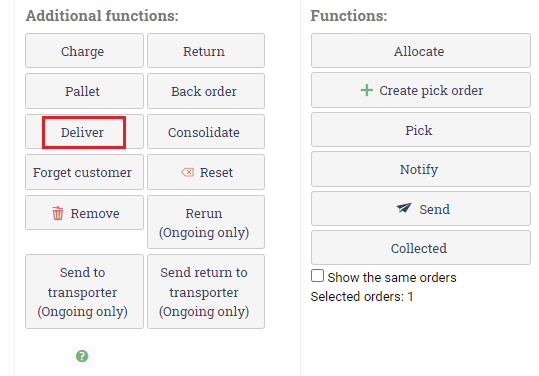
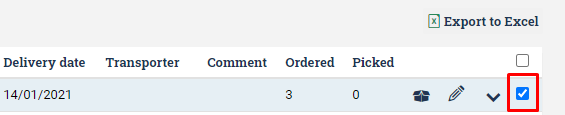
If you wish to select the items manually, go to the order list and find the order. Then check the order and press "Deliver":
This takes you to a page which shows you which order and order line you are working with:
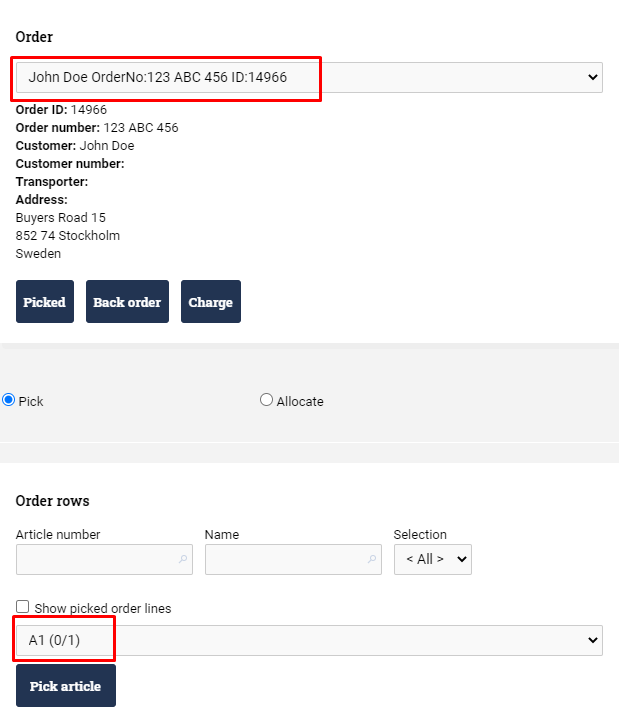
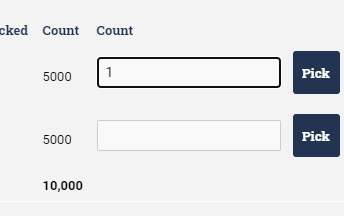
At the bottom of the page there is a table which shows you all goods which is available to pick for the order line. In this case, we have article A1 available in two different locations, HC101 and HC102:

It is up to us to decide which of these to use. If we want to pick 1 piece from location HC101, we simply input "1" in the correct row and press Pick:
Now that the order line for A1 has been fully picked, the system automatically moves on to the next order line. In this case, it is the order line for B1. That article is only available in location HC116:

Once B1 is picked, we have fully picked this order.
Printing picking lists and delivery notes
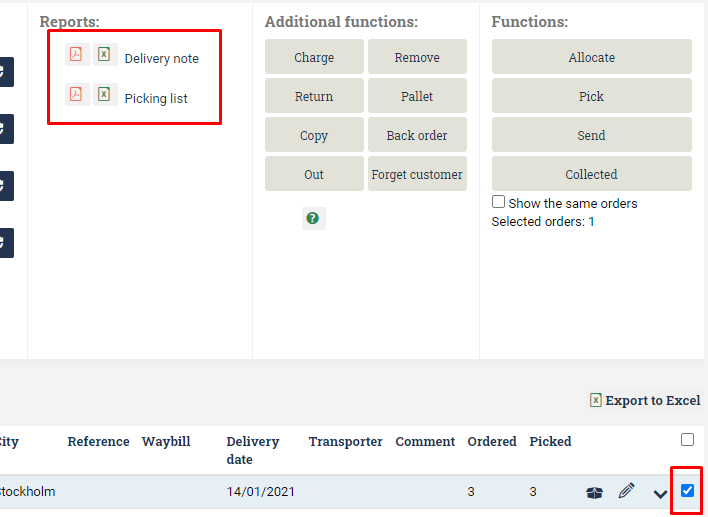
After you have picked the goods in the system (using either option 1 or option 2), you can print a picking list and a delivery note. Select the order and click on the report which you want to print:
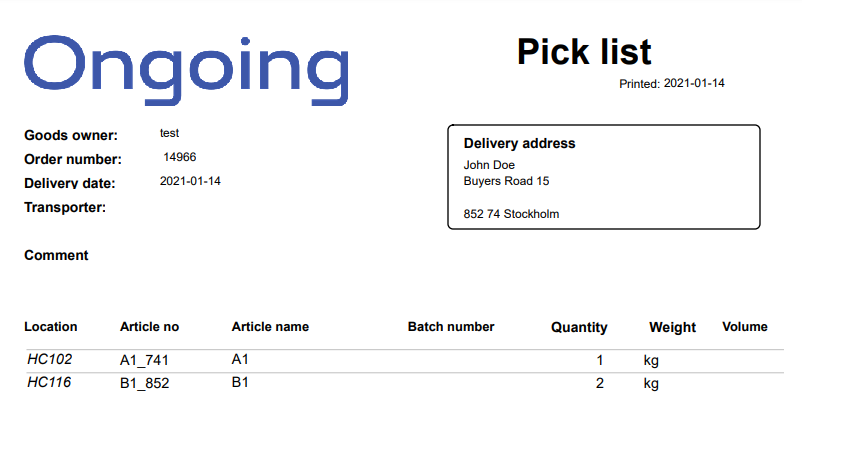
This generates a PDF which can you print:
Correcting mistakes
Inevitably there will be mistakes, either when working in the system or when you are physically picking the orders. These will need to be corrected. Let's continue with our example order from above. Say that you let the system select goods for you, but it selected 1 piece of A1 at location HC102. You want to switch this to the piece at location HC101.
First open the order and look at "Goods items on order". This shows you exactly which items have been picked on the order:

To the right, there is an icon called "Delete". If you press it, you will de-allocate the item from order (and return it to stock again). After you have done that, you can proceed like in option 2 and perform a manual pick, making sure to pick the item at location HC101.
Finishing the order
The above methods for picking an order are all that's required for the stock balances to be correct.
But you might wish to have an additional step which marks the order as being completed. If you have an integration to a shipping platform, you also want to be able to send the order to that external system in order to create transport labels.
We generally put these finishing actions on the buttons "Send" or "Collected":
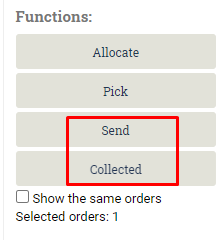
Please contact Ongoing if you wish to add custom actions to either of these buttons. By default, when you press "Collected", the order status will be updated, showing that the order has been fully processed:

Video on how to pick orders in Ongoing WMS
Picking multiple orders at the same time
The above guide showed you how to pick one order at a time. To improve productivity, you may wish to pick multiple orders at the same time. Please see this guide on how to pick multiple orders at the same time in Ongoing WMS.