Inventory tasks
Table of contents
Introduction
The tutorial Inventory adjustments describes how to make an inventory adjustment. This is useful when correcting occasional mistakes. However, if you want to make a more systematic inventory of your warehouse, you should consider using inventory tasks instead. An inventory task allows you declare which locations are to be inventoried:
- Create an inventory task for some locations, or all locations.
- Count the goods in the locations.
- Enter counts into the inventory task.
- Compare system quantities and actual quantities.
- Do recounts as required.
- Finish the inventory task, which adjusts the system quantities.
In this tutorial we will show you how to create and finish an inventory task. The example below is for a paper-based workflow. If you wish, you can also do the counting using a hand-held scanner.
Working with inventory tasks
Creating an inventory task
To create an inventory task, go to Warehouse ⇒ Inventory task and press Create new inventory.
A new window will appear where you can select which kind of inventory task you want to create:
- Article item based - allows you to create a task for certain articles (or all).
- Location based - allows you to create a task for certain locations (e.g. all locations in a particular aisle).
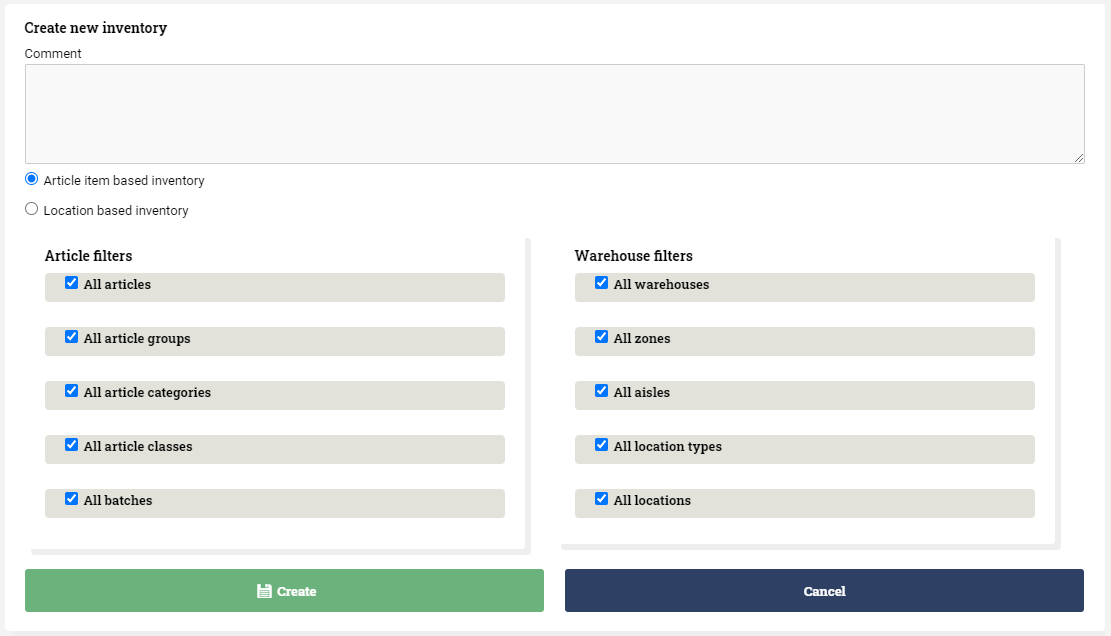
For this tutorial, we will create an Article item based inventory task with all filter boxes checked.
Count the goods in the locations
You can generate a printout of the inventory task by clicking here:

Take the printout with you and visit each location in turn. Count the goods at each location and make a note on the printout.
Enter counts into the inventory task
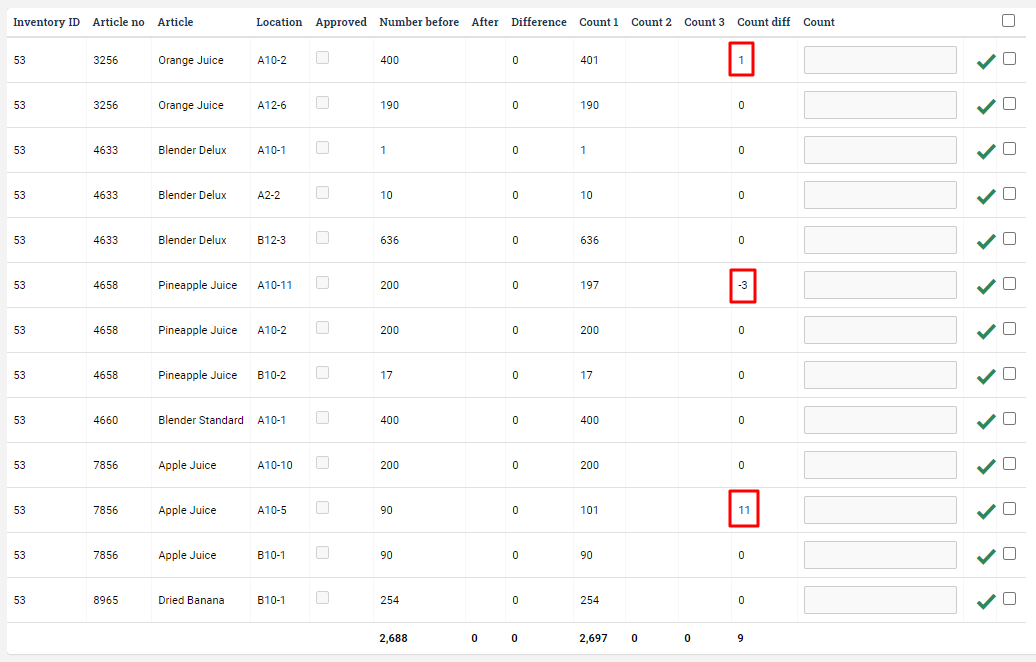
Now that you have all the counts, it is time to enter them into the inventory task. Let's say we found 401 pieces of Orange Juice at location A10-2, and 190 pieces at location A12-6. Enter it like shown below, and press one of the check mark buttons to record the values:

This step can also be performed in Ongoing WMS Scanning. Please refer to guide about how to use Ongoing WMS Scanning to count on an inventory task.
Compare and do recounts as necessary
When all counts have been entered, it is time to compare. We find the following three differences between the system quantities and the counted quantities:
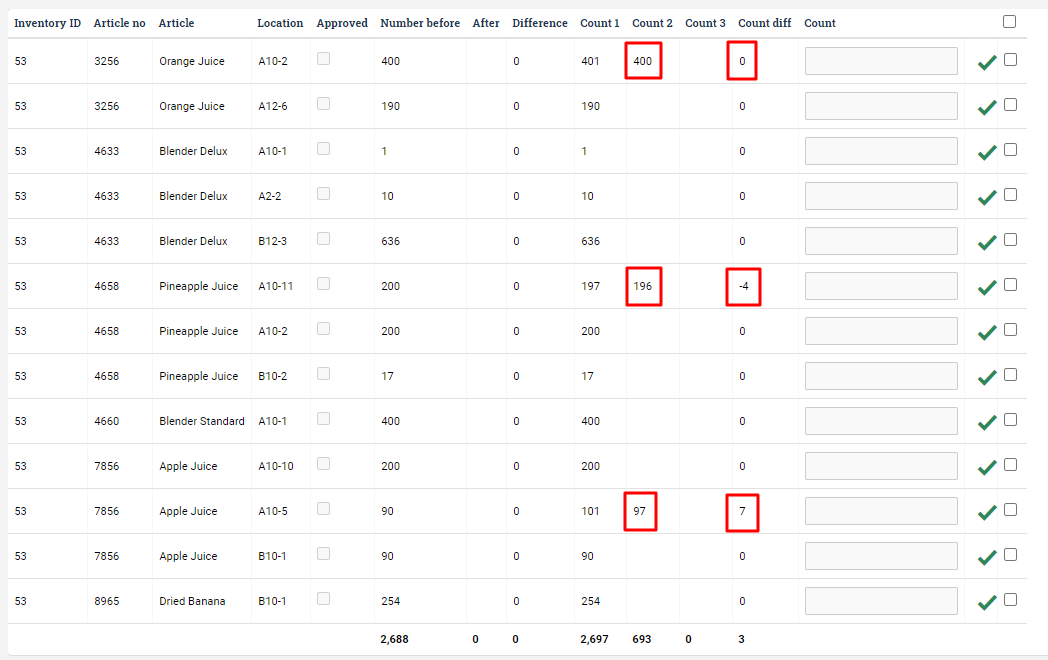
We decide to do a recount of just these three locations. Press Next count:

After the recount, we find that the first diff disappeared, the second got worse, and the third got better:
Finish the inventory task
We are now ready to finish the task. Each row must either be approved or not approved.
If you have found a diff and you want to adjust the stock balances accordingly, you must approve the row.
Let's say we want to approve all rows, except for the one referring to the missing 4 pieces of Pineapple Juice. Check all rows except for one, and press ![]()
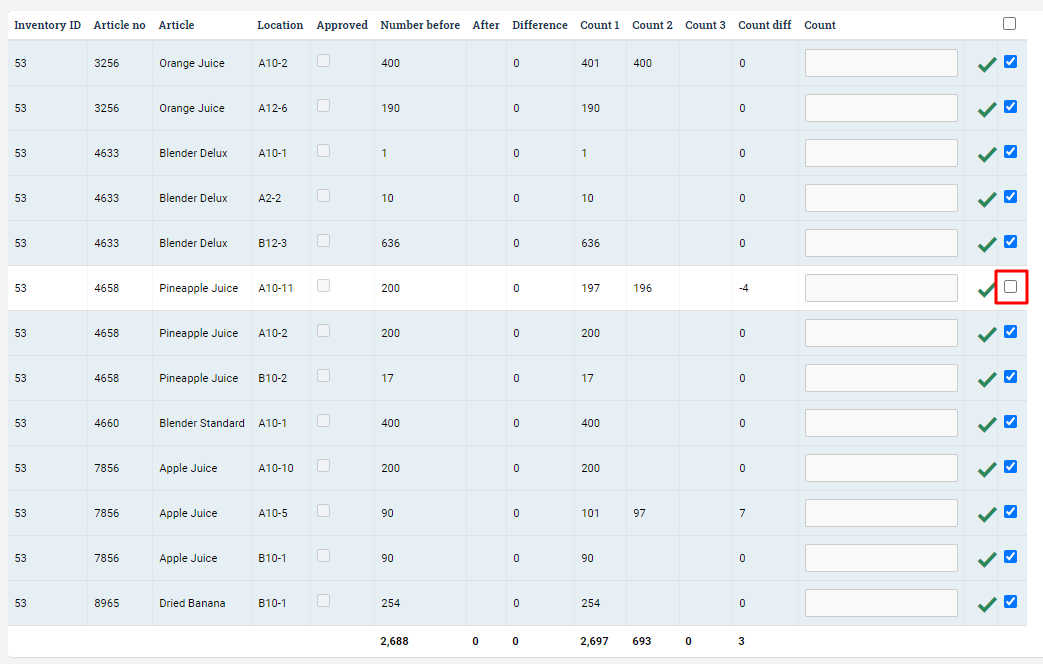
Then press Finish inventory:

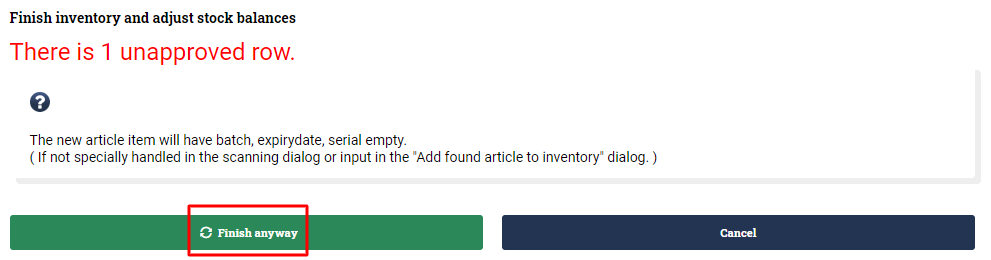
A new window appears which gives you an overview of how many approved and unapproved lines there are. Press Finish:
The inventory task is now finished, and we can use Goods Flow ⇒ Inventory Adjustments to check which inventory adjustments were made:
