Inventory adjustments
Table of contents
Introduction
In almost any warehouse operation, mistakes will be made during receiving and shipping goods. This results in faulty stock values which need to be corrected. In Ongoing WMS, such corrections are called inventory adjustments.
If you are going to inventory your entire warehouse (or several aisles), consider using inventory tasks. An inventory task allows you to define which locations are going to be inventoried and keep track of which locations have already been counted.
Adjusting the stock at one location
Go to Warehouse ⇒ Inventory ⇒ Stock-taking. In the stock-taking page, there is a table. Find the correct row and input the total number of items at the location and then press Inv.
Let's say that the system believes we have 118 broom handles at location HA113, but after checking the location, we realize that there are 121 broom handles there. To correct this, we would fill in the table like so:

Adjusting the stock at many locations
The above method works fine, but sometimes you might want to enter many inventory counts into the table, and then perform all adjustments at once.
Let's say that the system believes that there are 50 brooms at location HC103 and 70 brooms at location HD121. When checking, we find that the correct values are 49 and 71, respectively.
We can enter these values into the table and then press the larger Inventory button at the top of the page:
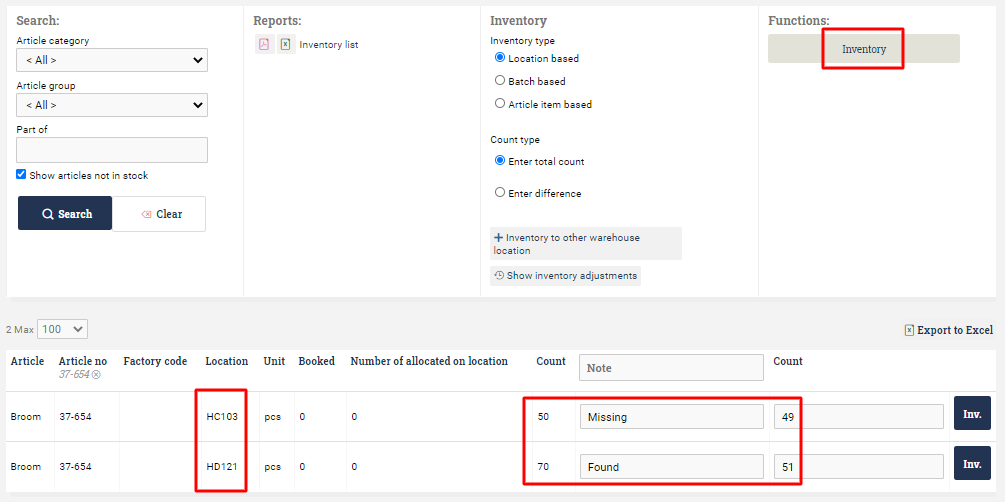
This performs both transactions at once.
Goods found at empty locations
If you have found goods at an empty location (or, more generally, at a location which doesn't already contain the article in question), then you cannot use the table to make an inventory adjustment. Instead, click on Inventory to other warehouse location:
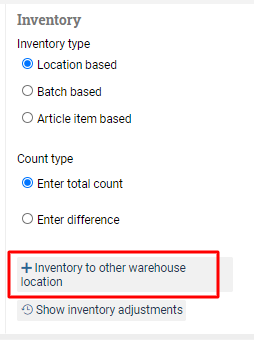
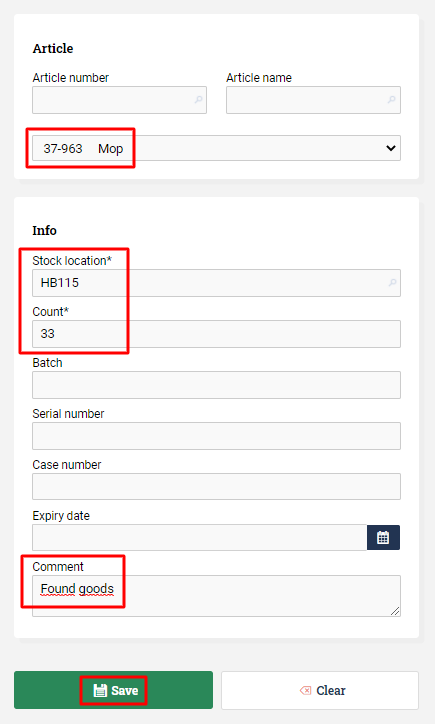
Then enter the article, the location, the number of found items, and then click on Save.
For instance, if we have found 33 mops at location HB115, we would enter it like so:
Checking which inventory adjustments have been made
To check which inventory adjustments have been made, go to Goods Flow ⇒ Inventory adjustments. You can filter for transactions made during certain dates, or by certain users, and so on.
The four transactions which were made when making this guide show up like this in the transaction log:

Selecting adjustment cause for inventory adjustments
When making inventory adjustments, it may be required to select an inventory cause for the adjustment. This can typically be done directly as a comment in the "Note"-field or, if it is required that only certain adjustment causes may be selected, through enabling an additional column in the standard view of the Stock-taking page.
Before enabling the actual column, add the adjustment causes under the Registers ⇒ Adjustment Causes page, by clicking the "Create new adjustment cause" button.
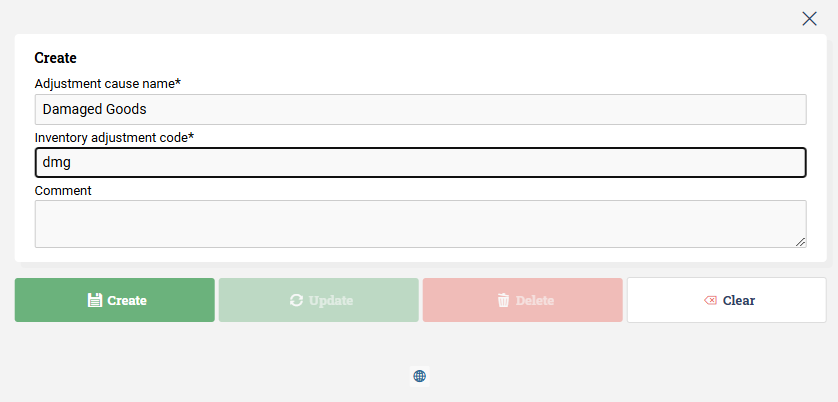
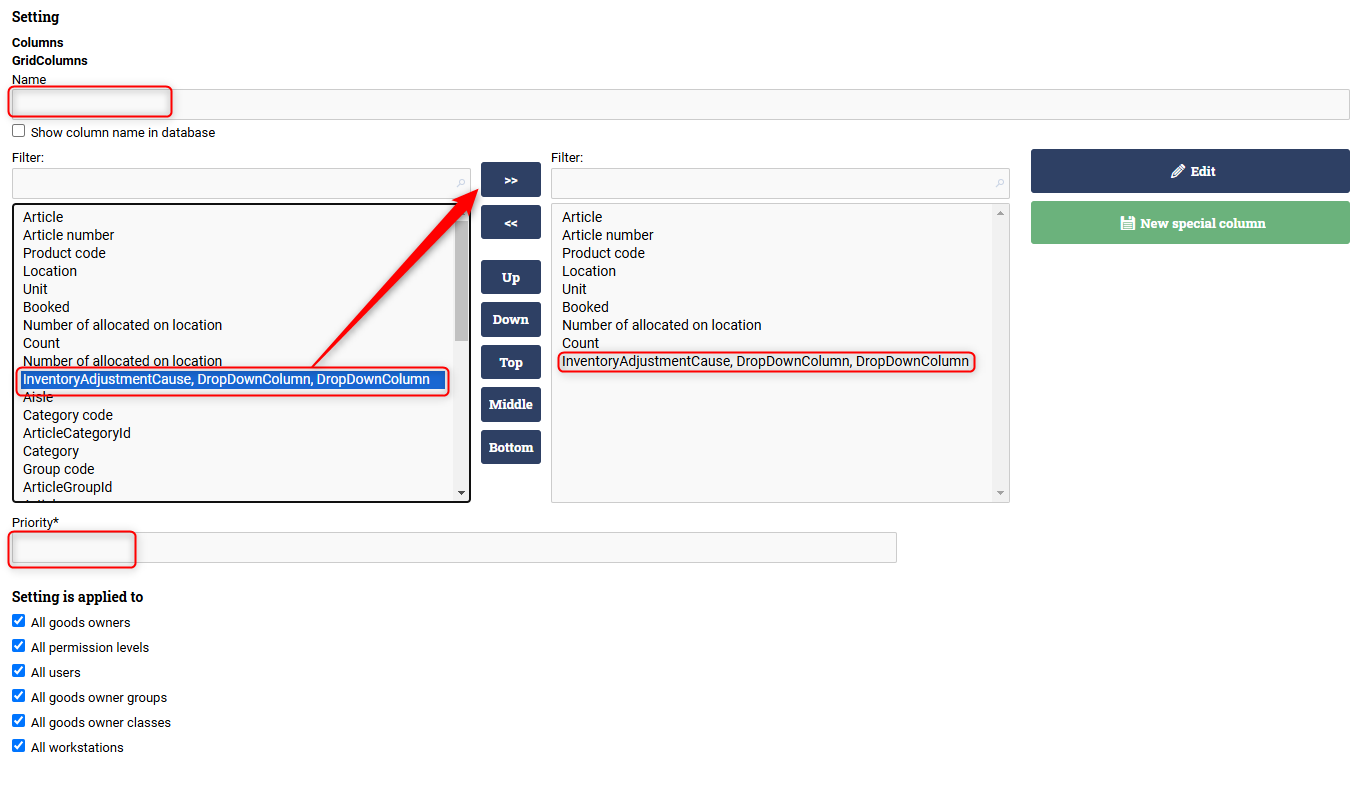
Move the field "InventoryAdjustmentCause" to the right using the arrow highlighted in the above picture. Give the setting a name and a priority (10 is standard). After this, scroll down and click create. For more information on how to set permissions etc, see our page on changing columns and other settings.
When navigating back to the Warehouse ⇒ Inventory ⇒ Stock-taking page a dropdown menu with your different adjustment causes is available.

To select adjustment causes for all rows at the same time, use the top dropdown menu choice, otherwise just select an adjustment cause for each individual row from the dropdown menu.
Adjust allocated location
By default, it is not allowed to stock-take a location when there are allocated items on that location. This is because someone might be in the middle of scanning an item from that location and therefore the actual stock at the moment of adjusting might be uncertain. If you have your processes in control you might want to change this behaviour. A new setting allows inventory transactions to be performed on locations containing allocated items. If a transaction requires Ongoing WMS to deallocate items from orders, users will be prompted to confirm the deallocation before proceeding. This feature provides greater flexibility in stock-taking while maintaining control over allocated inventory. Locate the setting and change it yourelf and talk to Ongoing to help you activate it.