
Ongoing WMS Fortnox 3PL invoicing integration
Table of contents
Introduction
The invoicing integration is intended to be used by warehouse operators who wish to automate the invoicing process between Ongoing WMS' invoicing module and Fortnox. Read more about Ongoing WMS 3PL invoicing. The integration can be used to send invoices from Ongoing WMS to Fortnox.
Setup
To be able to export invoices from Ongoing WMS to Fortnox there are a few things that must be setup correctly first.
-
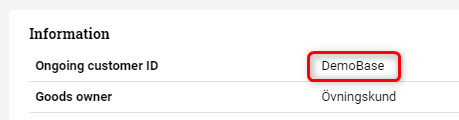
Edit the goods owner (How to edit goods owner). The value in the field Advanced ⇒ References ⇒ Customer Code must be the customer number that the goods owner has in Fortnox:
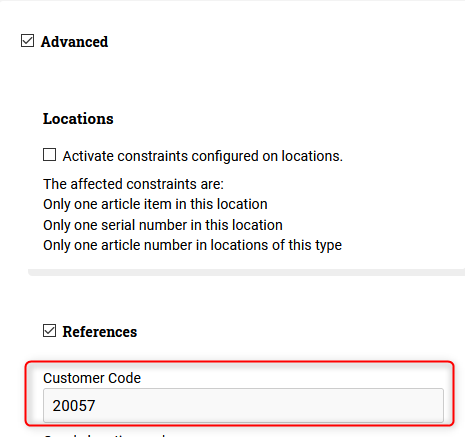
Customer code in Ongoing WMS is the same as customer number in Fortnox. -
Every price list entry must have an article number and an account:
The article number in the price list corresponds to the article in Fortnox and the account corresponds to the account the article belongs to in Fortnox.
Note: The integration will automatically create articles (price list) in Fortnox if they don't already exist. If the article is created by the integration you will need to edit the unit in Fortnox manually. For information about how to edit your price list please see 3PL invoicing documentation.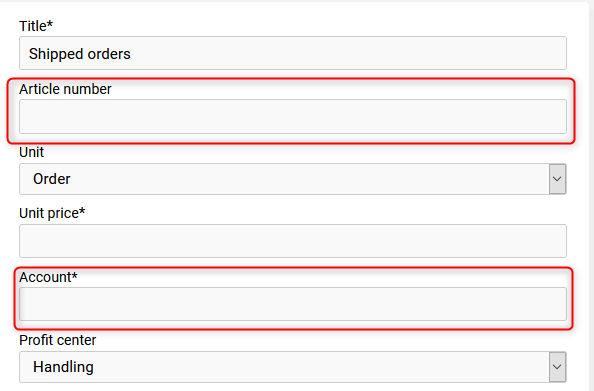
Fill in article number and account in Ongoing WMS. -
If the invoice in Ongoing WMS has an invoice number that will be transmitted to Fortnox:
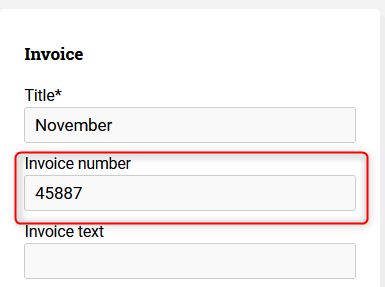
Invoice number on the invoice is the same as in Fortnox.
If you need to update the invoice rows in Fortnox you can simply export the invoice again.
Fortnox uses OAuth 2.0 in order to allow integrations to access the data needed. To setup the integration you will need to perform the following steps:
-
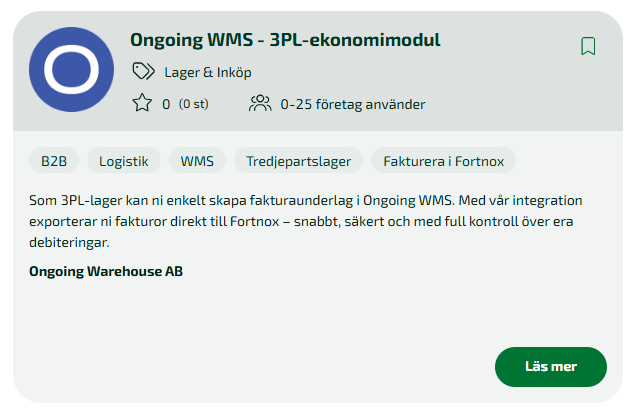
Activate the app Ongoing WMS - 3PL-ekonomimodul in the Fortnox Marketplace:
-
When the app is activated you will be redirected to the Ongoing landing page:
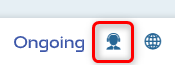
Here you will be asked to provide credentials for the WMS where you want to setup the integration. In the box marked System you can provide either the URL of the WMS, for example https://demo.ongoingsystems.se/demo/, or you can provide the Ongoing customer ID which can be found using the support info button at the bottom of the page when you are logged in on your WMS:
Username and Password corresponds to the user and password for the WMS.
-
-
Once the correct information is provided and the login button clicked you will be redirected to Fortnox where you will first be asked to login:
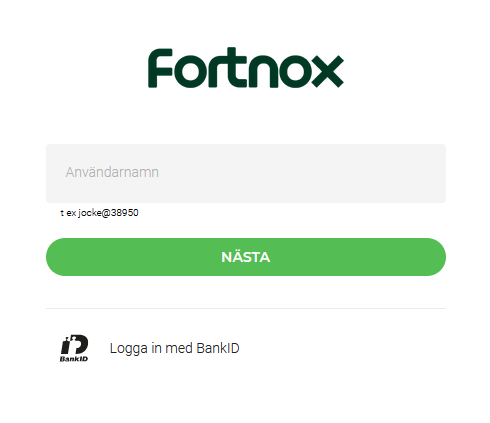
Note: The username here is the username for Fortnox.
-
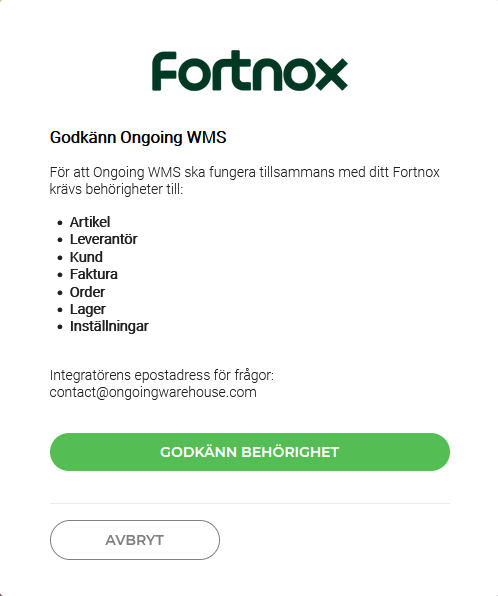
The next step is to read through which permissions the integration needs. In order to be able to use the integration all the requested permissions must be accepted. If you are unsure what the different permissions mean please contact us. If the required permissions are denied you will not be able to setup the integration.
- When the requested permissions are accepted you will be redirected to the previously provided Ongoing WMS. As the final step before creating the integration in your Ongoing WMS you can fine tune the integration settings. Once you are done click the Create button to create the integration.
Reactivate integration
Every time Ongoing WMS makes an API call to Fortnox an access token is used to authorize access to the Fortnox account. This token is only valid for 60 minutes and when it is expired a new token is generated by making another API call using a so called refresh token. When making the call to get a new access token a new refresh token is also issued. The refresh token used to get the new tokens is then immediately invalidated. This flow makes it difficult for unauthorized persons to get access to sensitive data but it is also vulnerable for errors when saving the new tokens. If something goes wrong when refreshing the tokens one might end up with only the expired tokens. If this happens you will be contacted by Ongoing and asked to reactivate the integration manually. To reactivate the integration, follow the steps below.
-
If you have previously filled in your email address in the section "Communication of problems" in the integration settings you will receive an email with a reactivation link as soon as the integration stops working. If you follow this link you can go directly to step 3.

If you have not received an email with the reactivation link, navigate to the integration settings in Ongoing WMS. Then click edit on the integration that has stopped working.

-
You will then see a message saying that the keys for the integration are no longer valid. Below the text is a clickable link saying "Click here to start the process which will reactivate the integration.". Click the link or copy the link from the box below it and paste it into the address bar of your browser.

-
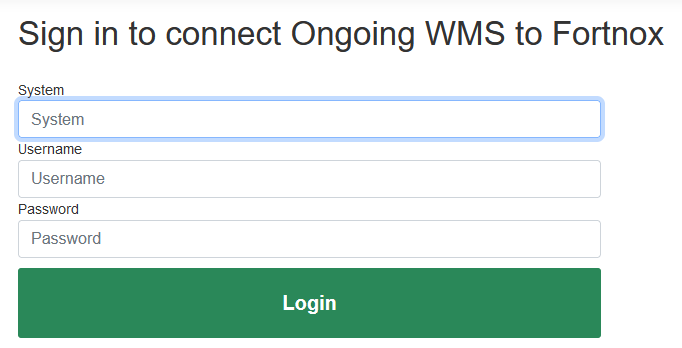
The link will send you to the Ongoing WMS login page. System and username should already be filled so all you have to do is type in your password and click login.
-
Once the correct information is provided and the login button clicked you will be redirected to Fortnox where you will first be asked to login:
Note: The username here is the username for Fortnox.
-
The next step is to read through which permissions the integration needs. In order to be able to use the integration all the requested permissions must be accepted. If you are unsure what the different permissions mean please contact us. If the required permissions are denied you will not be able to setup the integration. Also note that the user from the previous step must have the permissions stated here for the generated keys to have the permissions.
-
When the requested permissions are accepted the integration is reactivated and will run scheduled every 15 minutes again.