Outbound scanning using pallets
Table of contents
- Introduction
- Pallet items
- Article number based scanning
- Example scenario
- Create pallet item
- Print labels/reports
- Outside scanning dialog
Introduction
To have full traceability of how items are packaged this must be specfied in the outbound processs. The outbound scanning dialog in Ongoing WMS has this feature to enable you to efficiently scan items onto pallets or packages. With this type of scanning, it is possible to pick orders and put the scanned articles on pallets or in boxes on pallets. In Ongoing WMS, the space where the articles are put is referred to as pallet items. The difference between this scanning flow and batch pick scanning is that in the batch pick scanning one prepares multiple orders at the same time, and put the articles in labelled bins. With the outbound pallet scanning, one order is considered at the time and the packages are put on selected pallets or boxes on pallets.
The standard workflow is to first prepare the order to be picked in the system. The items which are to be picked are tied ("allocated") to the order. When this is done, the order can be processed in the hand-held unit. Whenever you scan an article, it is removed from stock. Progress can be easily monitored from the system. When all goods have been scanned, the order status is updated.
The following information can be displayed in the hand-held unit:
- A table containing the articles to pick.
- A table containing the articles which have already been picked.
- A table containing the pallet items. Green rows indicate that the pallet item is selected.
- Customer information (name, address, way of delivery, and so on).
Pallet items
A pallet item is considered a space where to put articles, which can be either a pallet or a box on a pallet. In this scanning dialog, all articles are picked to pallet items and depending on if the checkbox Put box on pallet is checked the pallet item that the article is picked to may be put on/inside another pallet item. For instance, an article is picked to a box and that box is placed on a pallet. Both the box and the pallet in this example are pallet items.
- A pallet item may be open or closed.
- Newly created pallet items are open.
- It is possible to select amongst open pallet items.
-
Articles are required to be picked to a pallet item.
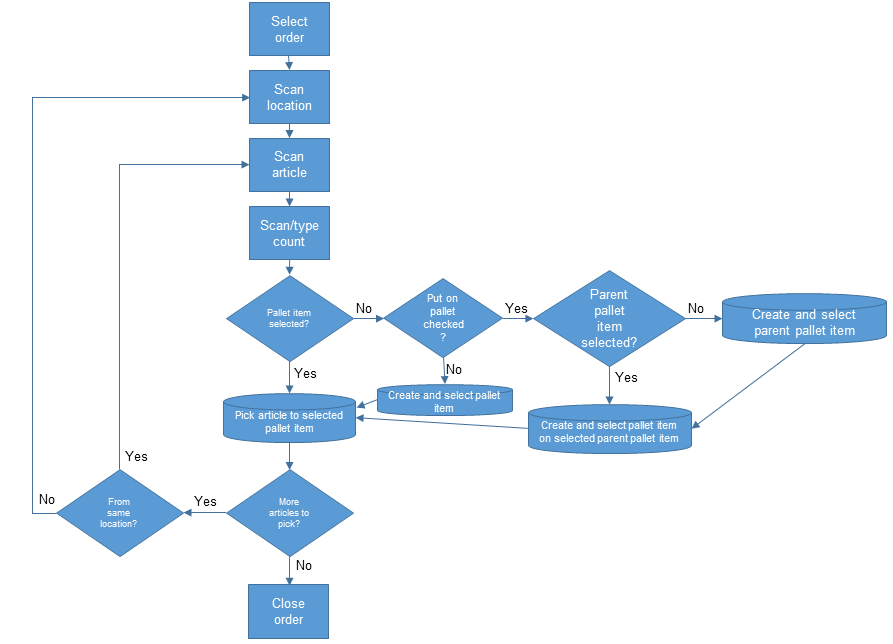
- If no pallet item is selected when picking an article, a new pallet item will be created and selected.
- If Put box on pallet is checked then a parent pallet item (the actual pallet) will be created and selected and then a child pallet item (the box on the pallet) will be created and selected
- An open pallet item is indicated by having an active close button.
- A selected pallet item is indicated with a green color.
-
Closing a pallet item will deselect it and optionally print a label.
- Closing a parent pallet item (pallet with boxes on it) will automatically close any open child pallet items (boxes).
- A pallet item is indicated to be "on" another pallet item by an arrow pointing upwards in the pallet items table.
Article number based scanning
Here is an illustration of the pallet scanning workflow.
- By pressing Create pallet item at any time you can manually create and select a new pallet item.
- By pressing Move goods between pallet items at any time you can move already picked articles between pallet items.
- By pressing Clear at any time during scanning of an article you can clear all scanned information for the current article.
- By pressing Cancel any time during the scanning you can select a new order to work with.
- By pressing Skip, you can skip a suggested article to process. Skipped articles will be placed at the back of the line of suggested articles.
- By pressing the button Close at any time during the scanning you can update the order to status Picked".
- When the order is closed it will get the status "Picked".
Example scenario
In this example image we are almost done with the picking process. While picking we have created one pallet (indicated by the EP type in the pallet items table) and three packages (indicated by the PK type) that are placed on the pallet (indicated by the arrow). On the pallet (EP) there is one closed package (PK), indicated by an inactive close button, and two open packages (PK), indicated by an active close button. One of the packages (PK) is selected, indicated by the green color and since the package is on a pallet the pallet is also selected with a slightly different green color.
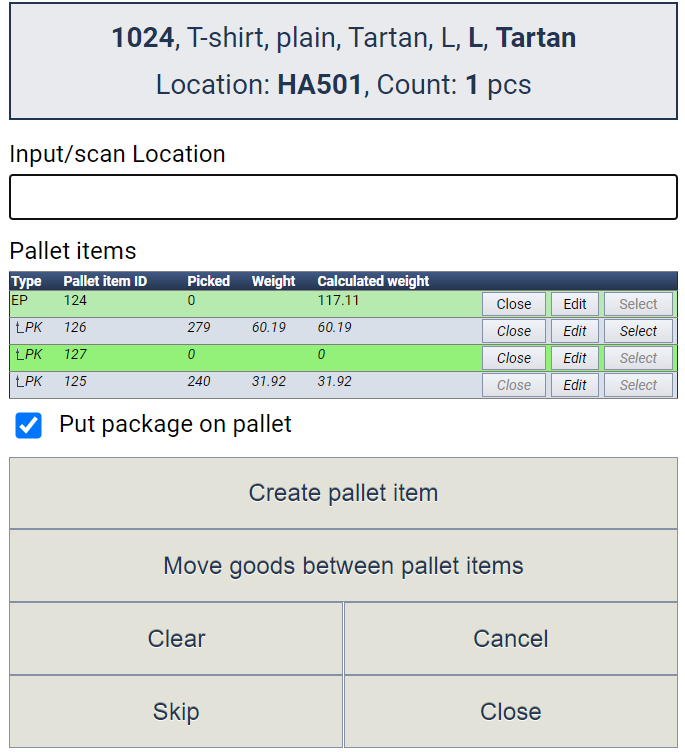
In the grey box a suggestion of an article to pick is shown.
Create/edit pallet item
You can manually create/edit pallet items inside the scanning dialog, where the following can be specified:
- Packaging type
- Goods category
- Parcel number
- Weight
- Volume (length, width and height)
The Calculated weight column will be updated as articles are put onto the pallets. Manually inputting Weight can be used to override Calculated weight.
Print labels/reports
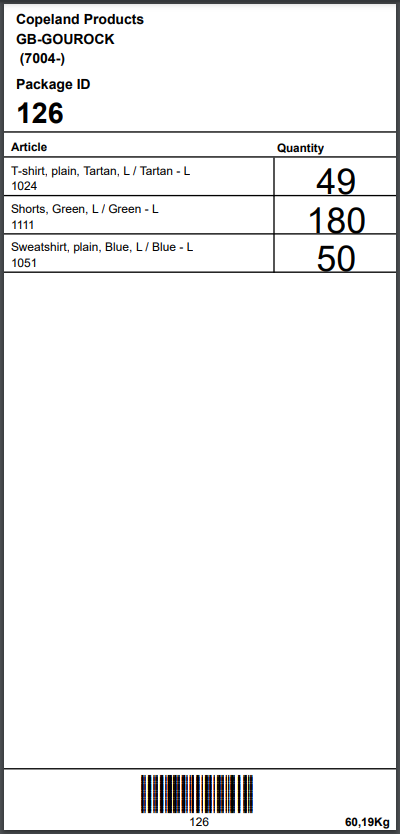
When a box is fully packed and closed it is possible to print a label containing the box contents. Here is an example of a box label containing a mix of different article numbers.
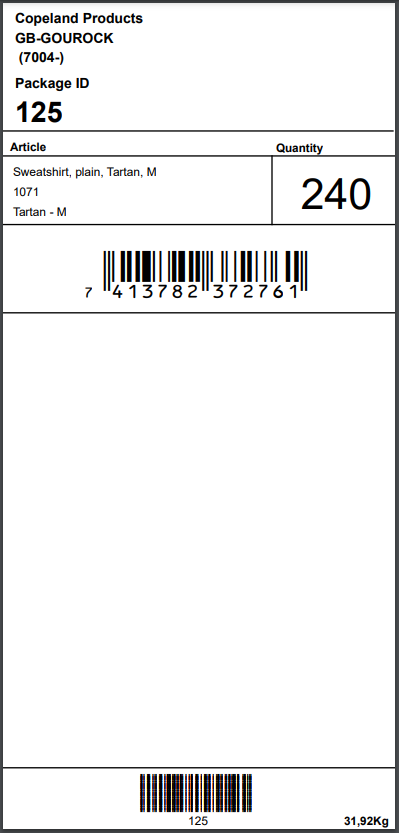
Another example when the box contains only one article number, it might make sense to print out that articles EAN barcode.
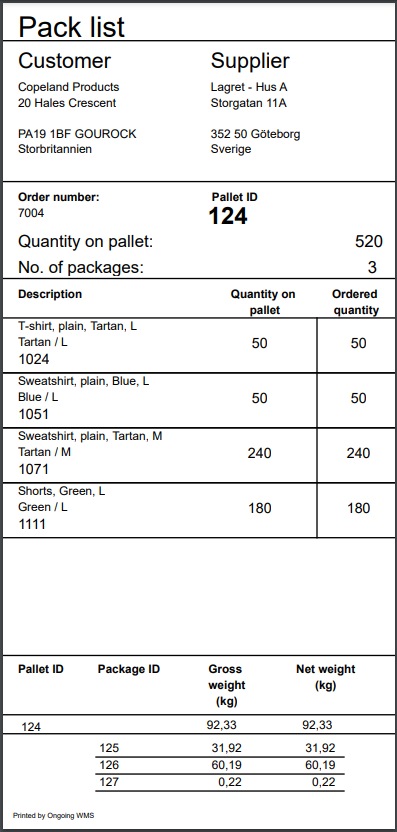
When closing the pallet containing all boxes it is possible to print a pack list for that pallet.
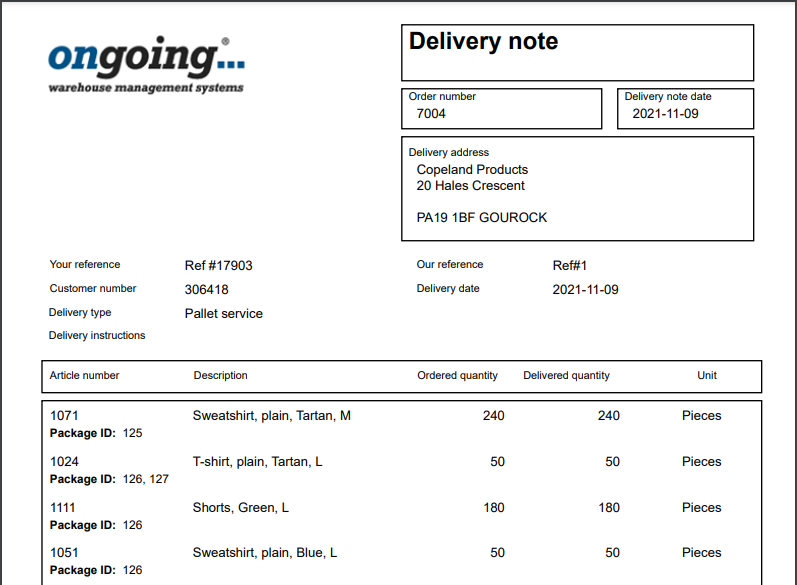
When the order is fully picked you may print a delivery note containing references to the package ids the goods were picked in
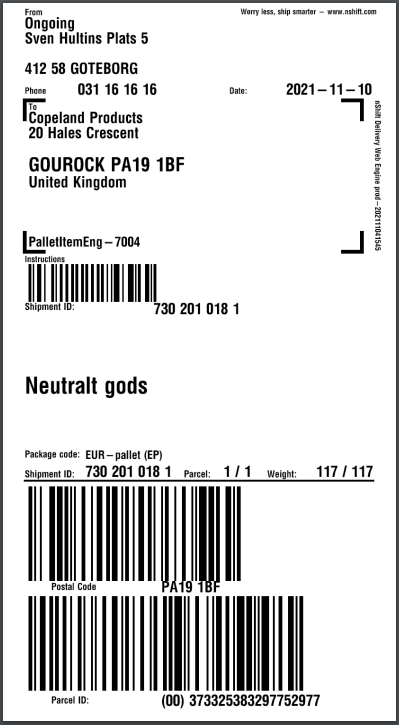
When using a delivery management software for booking transport the pallet item information is sent to that system to generate the correct number of labels. In the example above we would generate one label for the pallet. Example using nShift Delivery
Outside scanning dialog
When an order has been picked, the pallet items and their contents can be found by expanding the order in the order view of your Ongoing WMS.
