Setting up transporters for use with an integration
Table of contents
- Introduction
- Step 1: Adding transporters
- Step 2: Adding transport agreements
- Step 3: Address of the sender
- Next step
Introduction
If you have integrated Ongoing WMS with a shipping platform, you must set up some information regarding transporters before you can begin using the integration. There are three things to do:
- Add all transporters and transporter services to Ongoing WMS.
- Set up a transport agreement for each goods owner and transporter.
- Input the address of the sender which will appear on the shipping labels. (This step is only applicable for some shipping platforms.)
Step 1: Adding transporters
General steps
To add transporters and transporter services to Ongoing WMS, follow these steps:
- Go to Registers ⇒ Transport Companies.
- Click on the button Import transporters and services from integrations.
- A new window appears which lists every available transporter and transporter service.
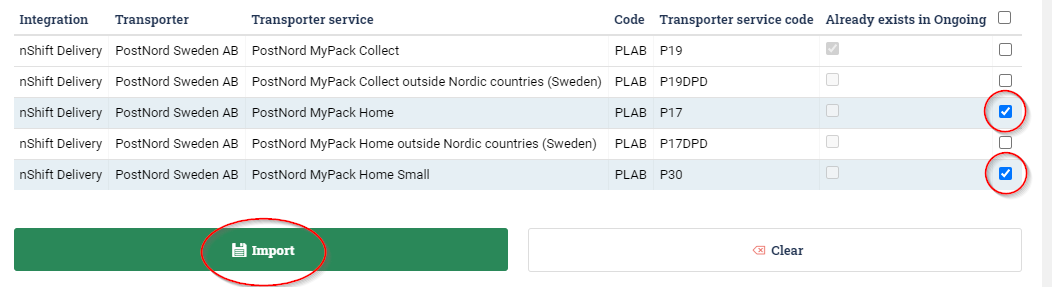
- Select each transporter service that you want to use, and click Import.
nShift Delivery example
As an example, say we have set up an integration with nShift Delivery. When we click on Import transporters and services from integrations in Ongoing WMS, we see a list of transporters and services which are available for us to use. In the below screenshot, we are importing two new services:
Step 2: Adding transport agreements
After you have added transporters, you must also add transport agreements to each goods owner where you want to use the integration. Each goods owner must have a transport agreement for each transporter that you wish to use with that goods owner.
General steps
To add transport agreements, follow these steps:
- Select a goods owner.
- Go to Registers ⇒ Transport Agreements.
- Click on the button Import transport agreements from integrations.
- A new window appears which lists every available agreement.
- Select the ones which belong to the current goods owner, and click Import.
nShift Delivery
To be able to use Import transport agreements from integrations with nShift Delivery, you need to ask nShift to enable REST API Address book on your account.
If you don't want to do that, then the agreements have to be added manually instead. Click here to learn how to do it.
Step 3: Address of the sender
This step only applies to these systems:
For these systems, Ongoing WMS controls what the address of the sender is. By default, the sender address will be the same as the warehouse address. To check which warehouse address is used for a particular goods owner, do this:
- Go to Administration ⇒ Goods owners and click edit on the goods owner in question.
- Make a note of which warehouse has been set as the goods owner's default warehouse.
- Go to Administration ⇒ Warehouses and open the warehouse from step 2.
- Check which address it has. This address will be used as the sender address.
If you need to customize the sender address in some way, please contact Ongoing.
Next step
You are now ready to begin using the integration.