Advised returns using return order (RMA)
Using a returns management systems or manually
Table of contents
Introduction
Advised returns or Return Merchandise Authorization (RMA) is in Ongoing WMS called return order. These can be advised manually in Ongoing WMS but are most commonly used together with a Returns Management Systems (RMS). Combining the customer facing features of a RMS with Ongoing WMS efficient warehouse processes aims to ease return management of e-commerce companies, irrespective of own warehousing or outsourcing to 3PL. The return handling can be done smoothly in Ongoing WMS as you can see in this walkthrough. In the instructions that follow the link the returns are not advised, opposed to when a returns management integration is put to use. The integration eliminates most of the manual work and makes the return handling in Ongoing WMS more efficient and accurate.
Workflow
With integration to Return Management System the returns will be advised.
- The customer fills in what is returned and return reason in the RMS-system.
- The information will automatically be sent to Ongoing WMS and the warehouse will get the relevant information before the returned goods arrive. This will create a Return Order in Ongoing WMS. The return order can also be created directly in Ongoing WMS by the goods owner's customer support.
-
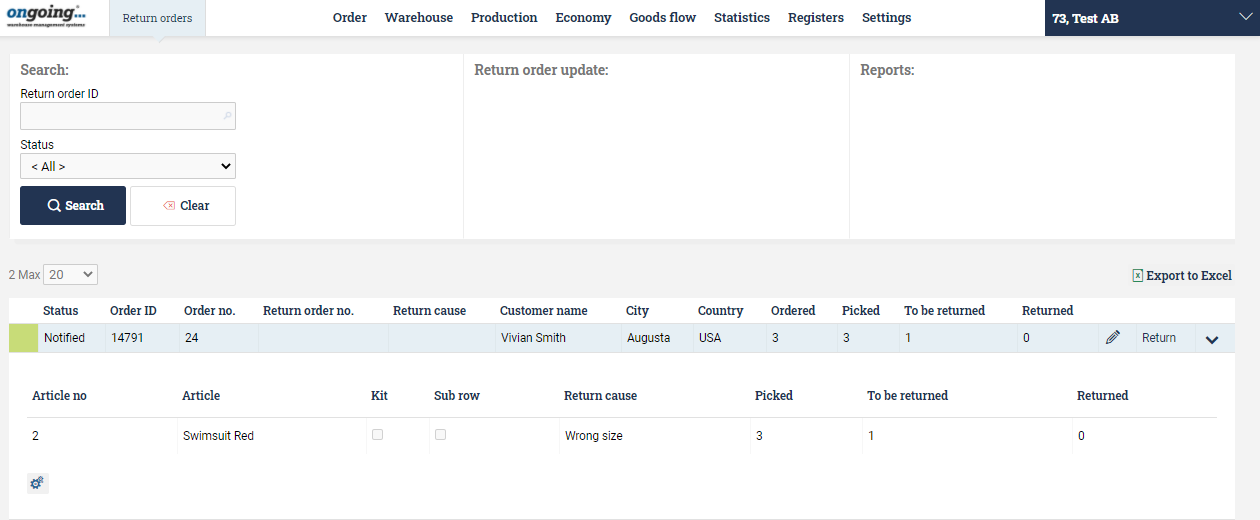
Go to Order ⇒ Return order list. Here you will see everything that has been returned via the RMS-system. In the example below, Vivian Smith has returned one red swimsuit due to the size being wrong.
When you receive the returned goods you can either use scanning, which this video demonstrates, or manually handle the returned goods in Ongoing WMS. In the two examples below you will first learn to handle advised returns using scanning and then how to do it manually.
-
Choose between returning in the Ongoing WMS Administration user interface or using Ongoing WMS Scanning app.
Return using scanning:
Go to the scanning module. In the scanning module select “Return”.
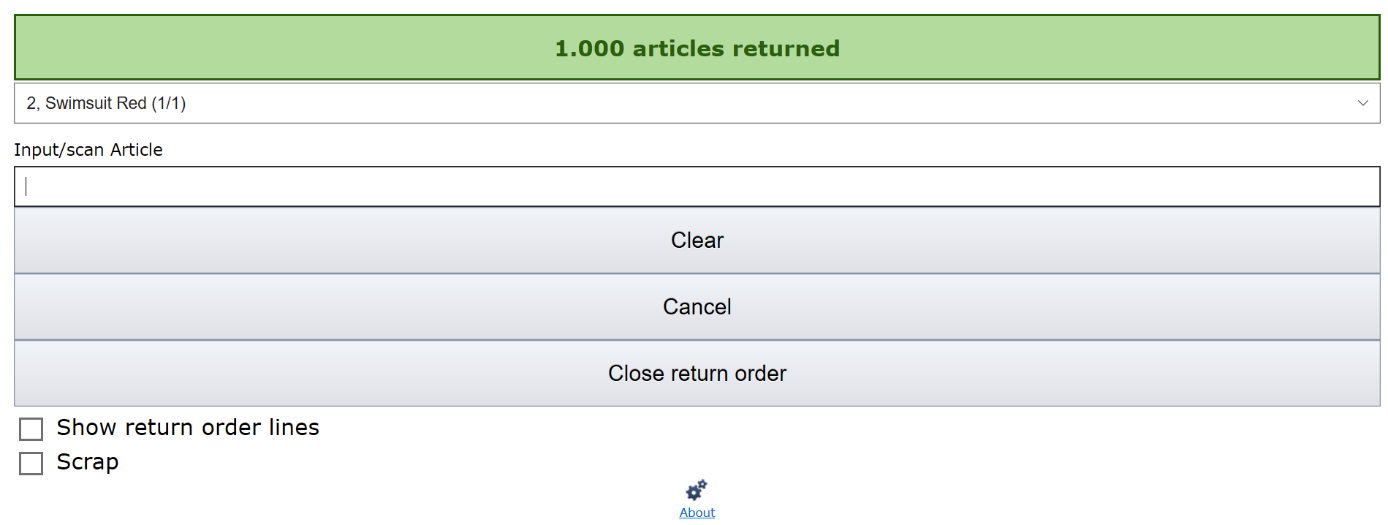
Choose which return order you want to scan:

Scan the Return Order barcode and it will show up in the system. As you can see in the bottom left corner, the object can be marked as “Scrap” and it will be removed from the stock balance.

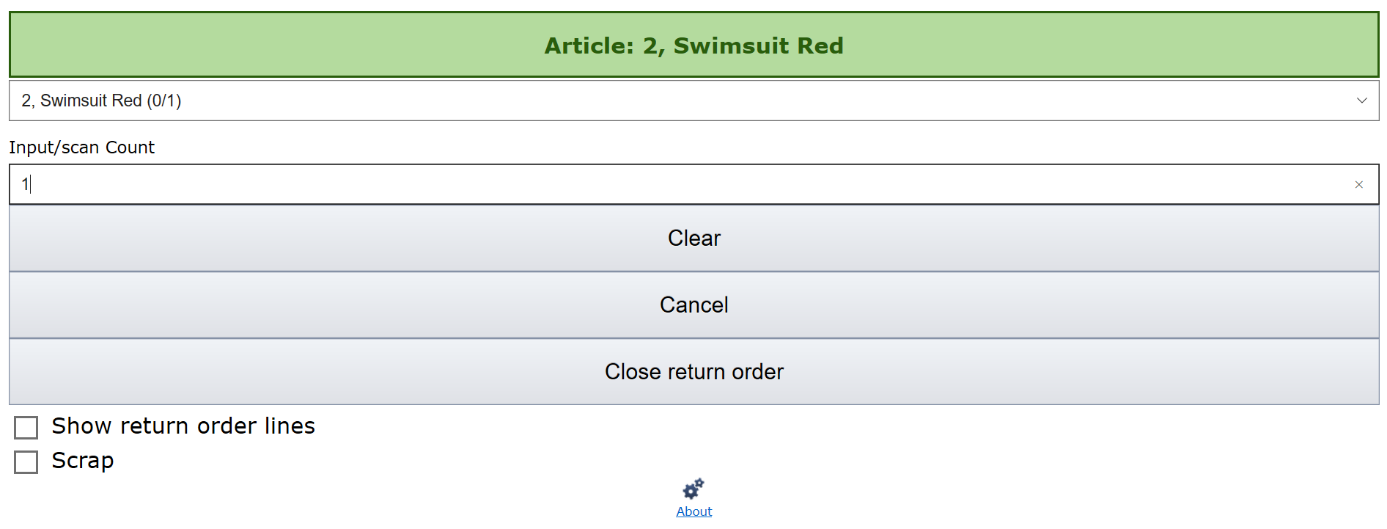
Enter quantity of the article:
Scan the Warehouse location where you store the goods. This can be edited such that the location is a placement in the cart if requested.
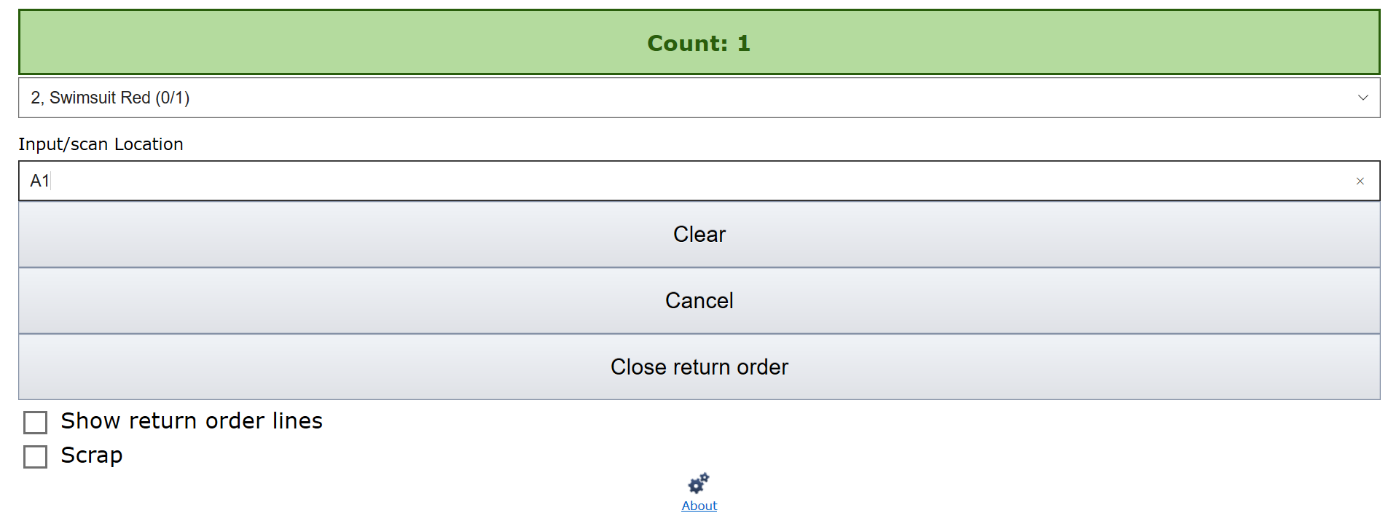
The returned article has now been registered as returned. The stock balance will automatically be updated.
Order status changes from “Notified” to “Returned”

Return manually in Ongoing WMS Administration UI
When the goods arrive, go to the Order ⇒ Return order list and select Return at the right hand side of the order. A new window will pop up:

The “count” field will be set automatically according to the number of returned items that was supplied in the return order. If there is a deviation you can enter count manually. Then press "Return goods".
Finally, select “Mark as returned” at the bottom.

You will now see the return order status has changed from “Notified” to “Returned”.
The stock balance in Ongoing WMS will automatically be updated (either the returned good will be sold again or be discarded).
System Integrations
The most important consideration when choosing a returns management system is that it needs to support the carriers which you intend to use.
The following companies have developed their own integrations from their shipping platform to Ongoing WMS:
Create return orders manually
The return orders can also be created manually in Ongoing WMS. This allows goods owners to sign in to Ongoing WMS and advise the warehouse about a return and give additional useful information to the warehouse. The button Create return order is found in the top right corner of the order list (Order => Order list).

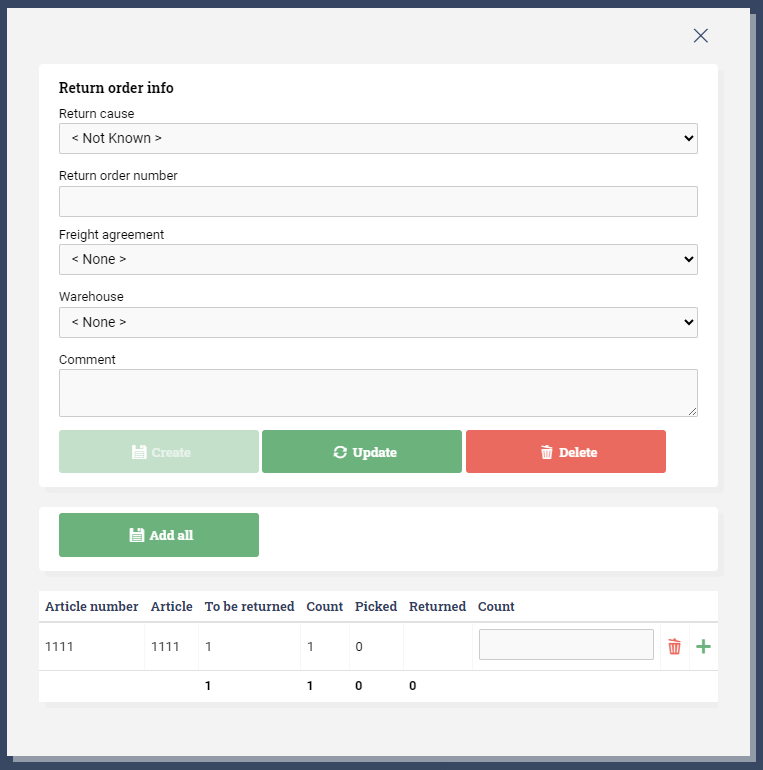
A modal window will show up which allows you to add information about the return order and then add information about the items expected to be returned.
